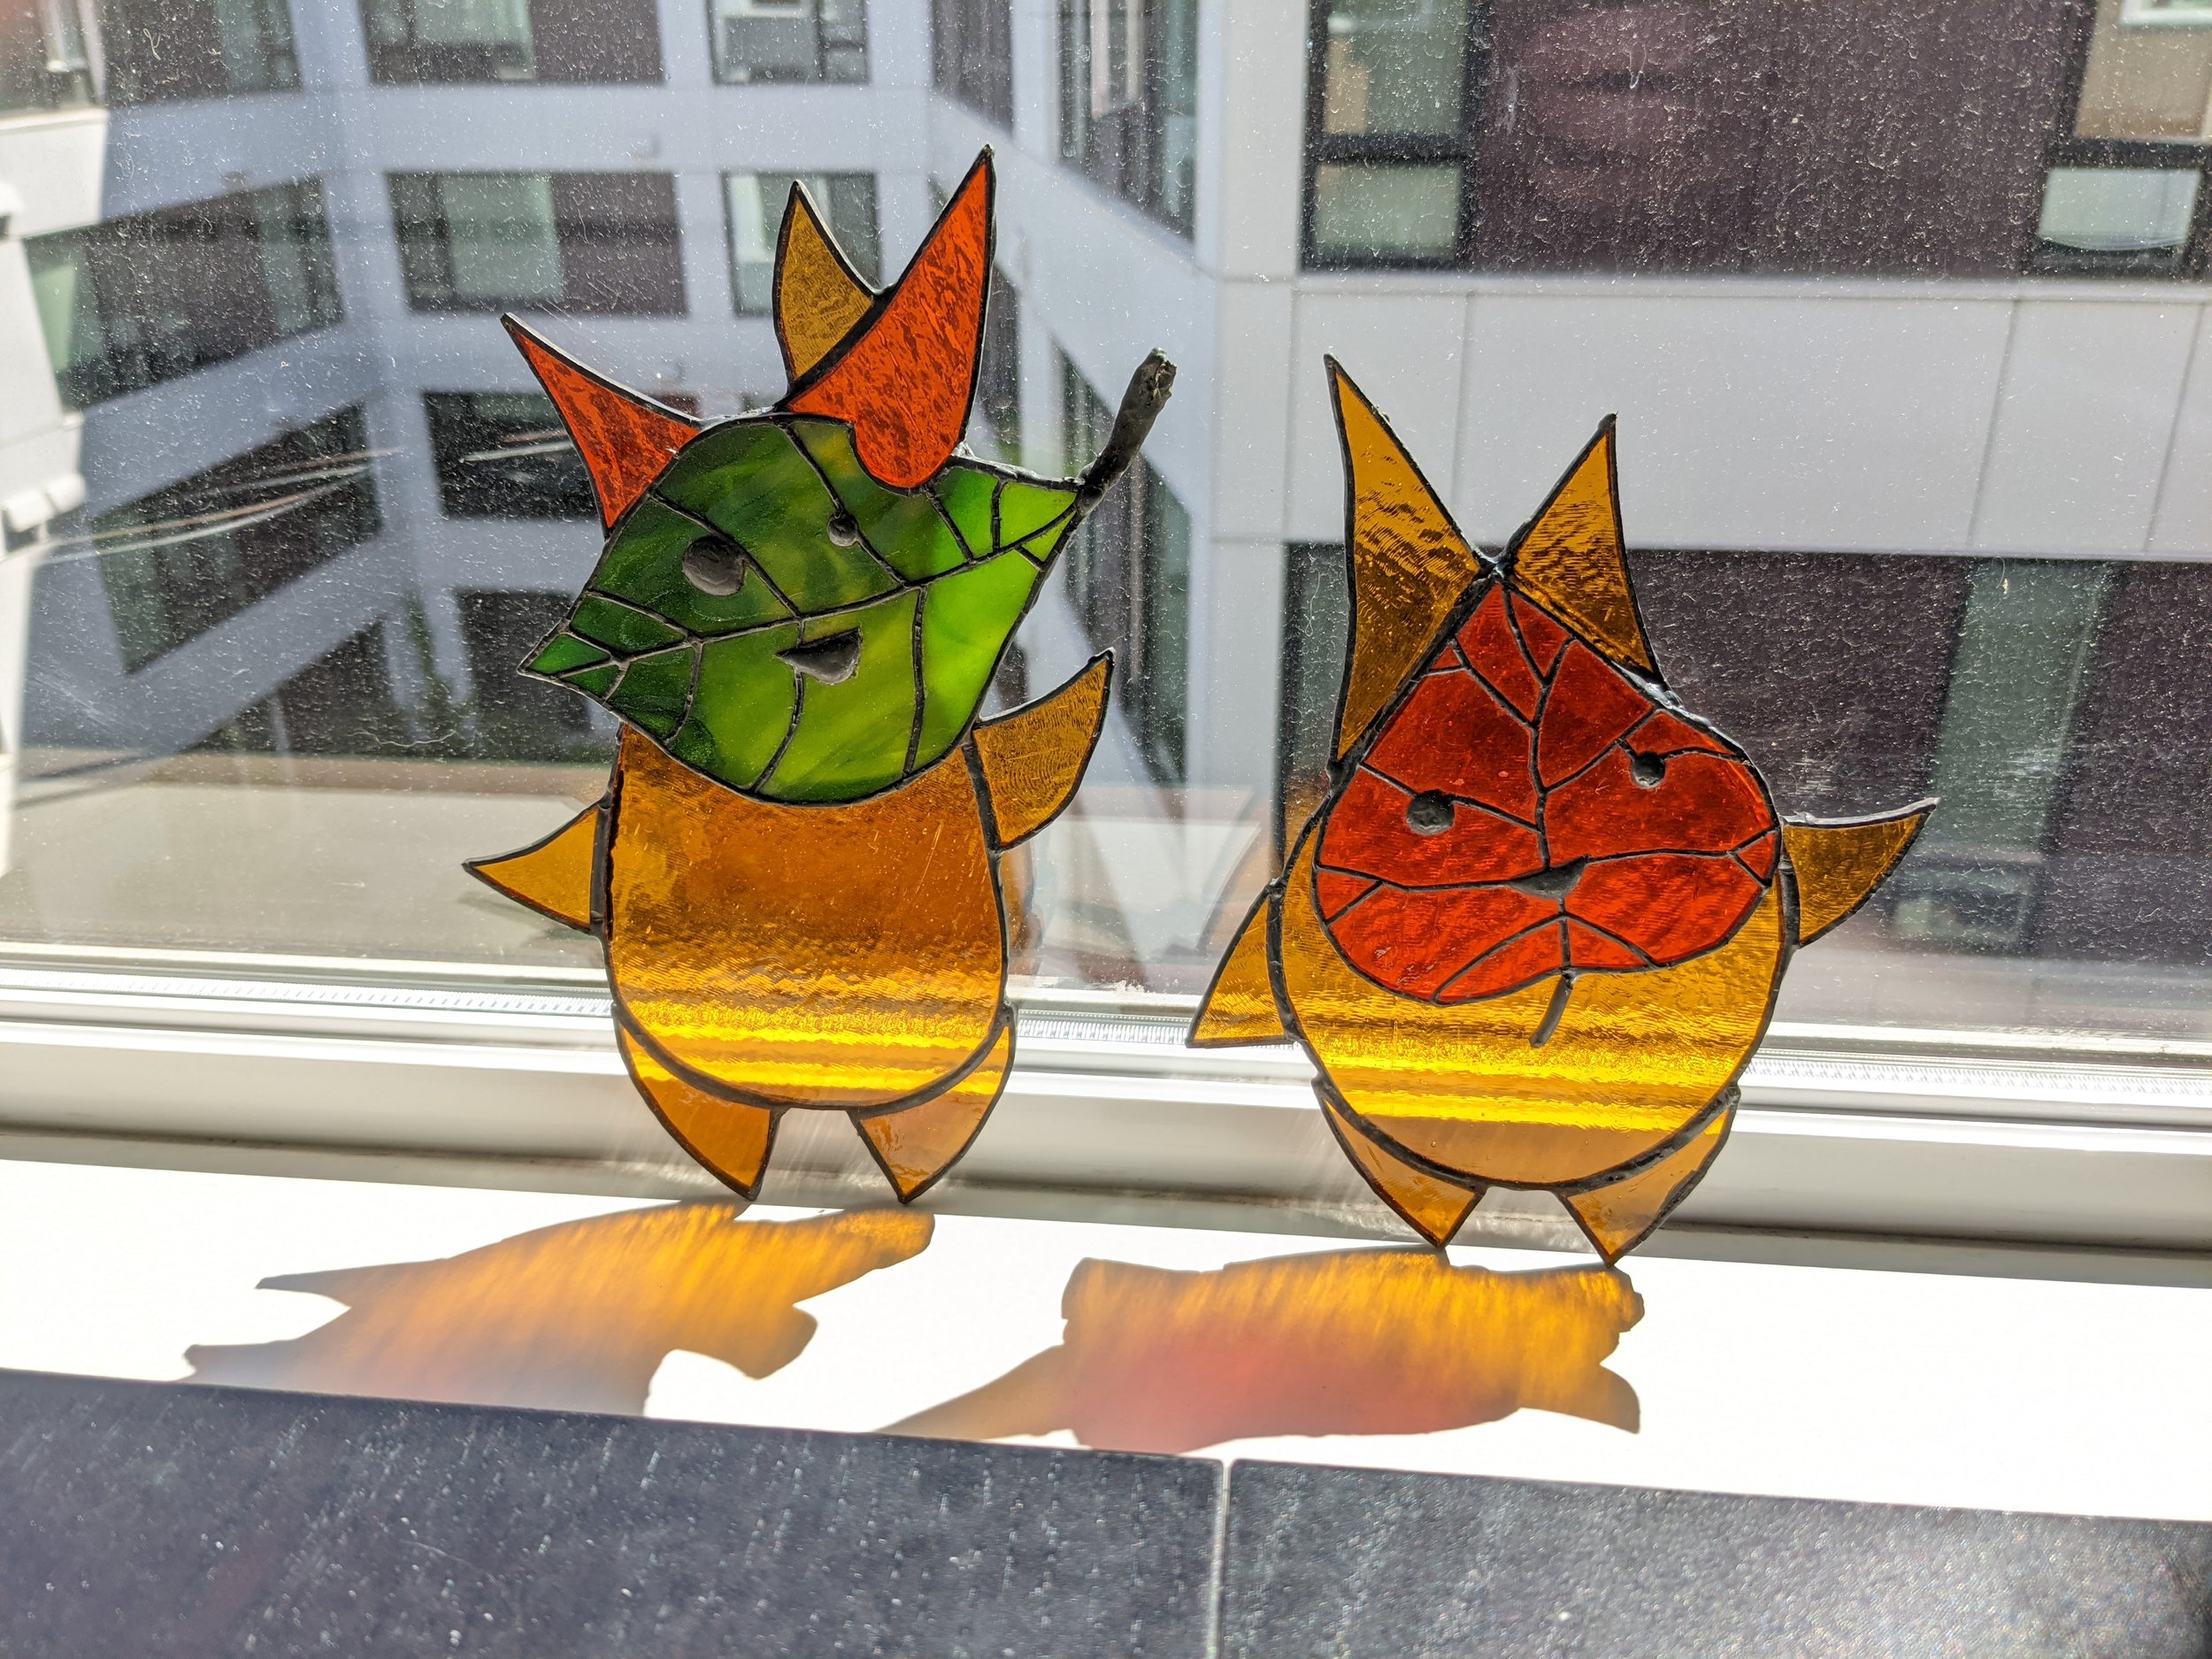
From metal smelting to spray painting to laser cutting I am amazed by the hobbies I have managed to pick up in my apartment. So when I had the idea for shattering dozens of glass panels and then melting them back together to make pretty shapes I knew I had to give it a shot. That is how I decided to try making some stained glass figures for my and my partner’s 1st anniversary. We’re both fans of The Legend of Zelda series and when I stumbled on an online seller who made similar stained glass figured of the woodland tree spirits (Koroks) from the game I knew I had to give it a shot.
After an evening of YouTube, I felt like I had a general idea of the process behind stained glass. Cut the glass, attach copper around the edges, and solder it all together. I’ve done more than enough micro-soldering so something on a larger scale felt like it wouldn’t be too bad. I found a kit online with all the tools needed and decided to start on a test piece that was included.


The process started with getting the template cut out into all the different pieces that were to be cut. After deciding which pieces were going to be which colored/patterned glass they were laid out and glued down to help with organization. Using a pen-like knife score lines were made around each of the patterns then pliers were used parallel or perpendicular against the score to snap the glass….preferable along the set line. The practice piece was all straight lines but I knew the final Koroks would have some wild curves. With everything cut out my starter kit included a sander which I used to trim the pieces down to their exact size. Fully cleaned up the patterns were removed, glass cleaned, and copper tape wrapped around each piece. The copper acted as a sticking point for the solder to bind to, connecting the pieces. Soldering the front back, and all around the outer edges I did a quick clean and was in awe of what I consider a not too bad first try at stained glass.
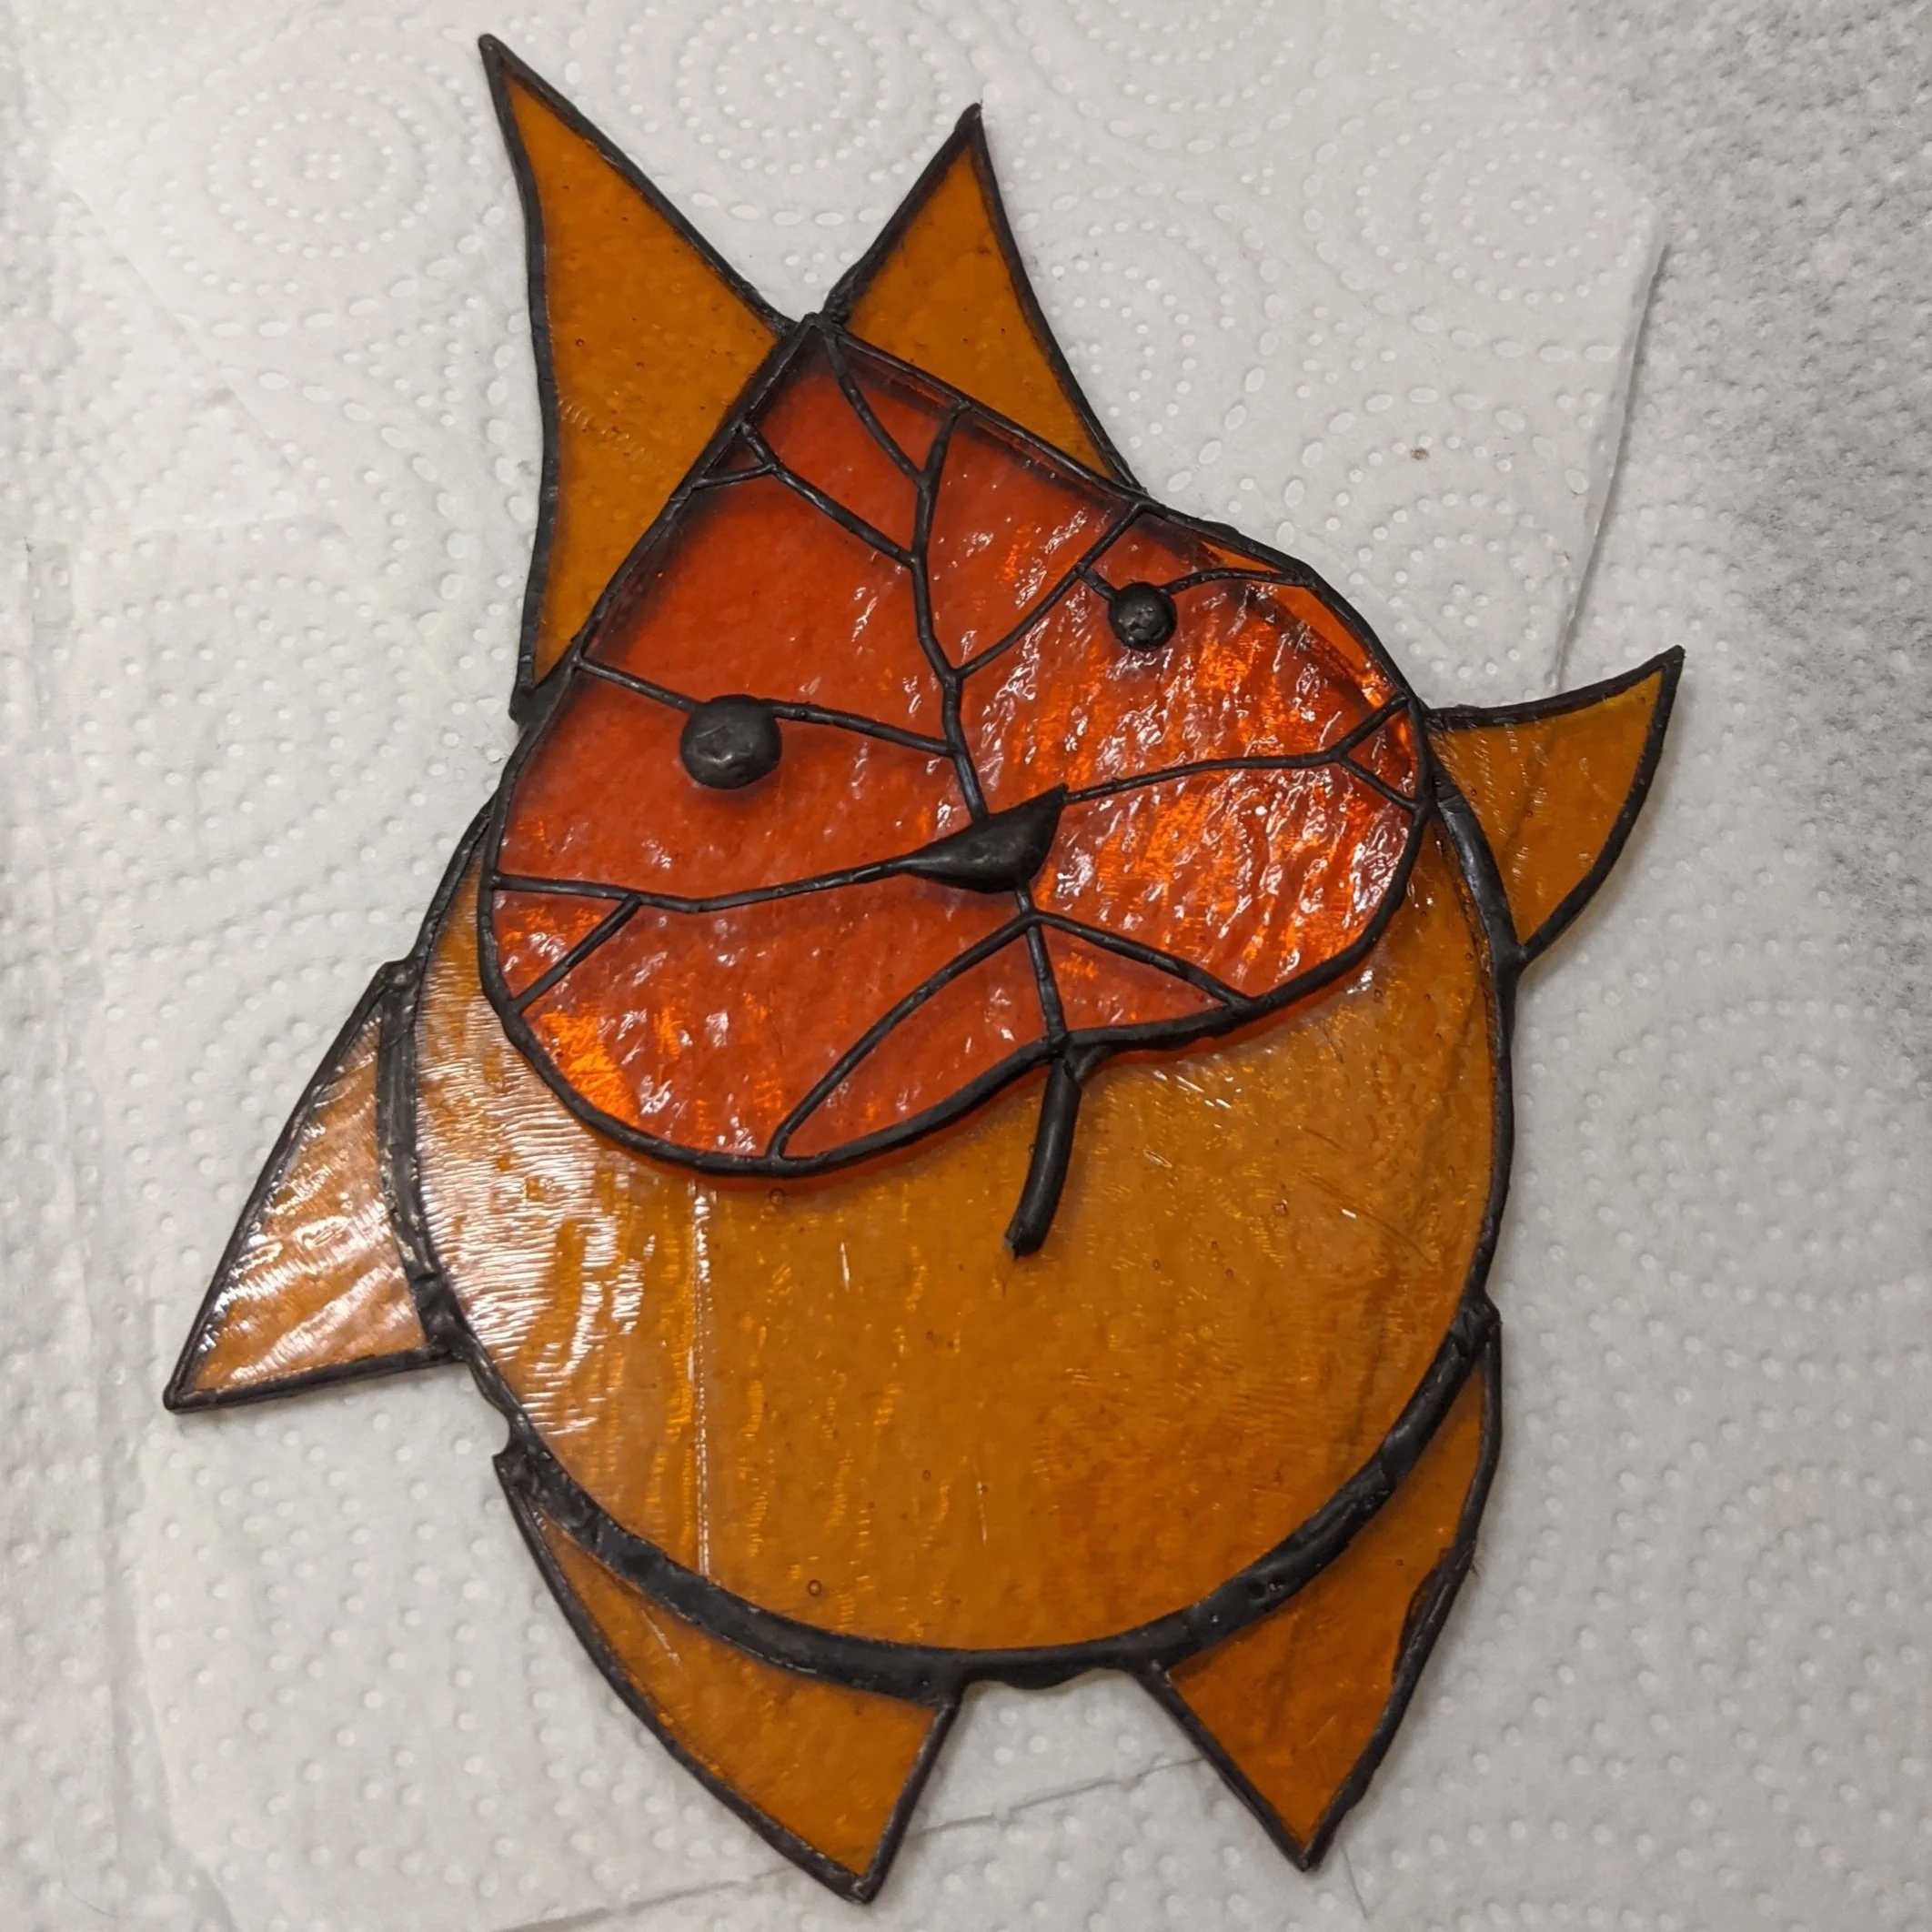
With way too much false confidence I jumped right into the final Koroks. First by making the patterns that I would use for cutting the glass. With the reference images to go off of I traced them on the computer splitting the layers of the model. The Koroks models I found online layered the stained glass and the added depth made them look more alive (as well as assisted in hiding some of my crimes). With the design done I printed them out and cut the pattern up into the pieces.
Coming from laser cutting design I was used to using up as much of the product as possible, getting each cut as close to the edge. With stained glass, I quickly discovered that while an expert could do that I definitely couldn’t. Most cuts went well but the curves of the faces and ears proved to be super difficult and after a few bad cuts I quickly adapted and changed up the model to reduce the jagged cuts. With everything loosely cut out came the tedious task of sanding it all down to final sizes.


While the sample stained glass piece was all straight lines these Koroks had complex curves that needed to line up together in multiple places. Not being able to cut that precise I used a tabletop sanding station to grind the pieces down to their correct size. One hand holding the glass against the grinder and the other angling a vacuum right at the glass to stop the thousands of tiny glass particles from flying all around my bathroom. Multiple hand cramps later everything was fitting together nicely and I could move on to attaching everything.
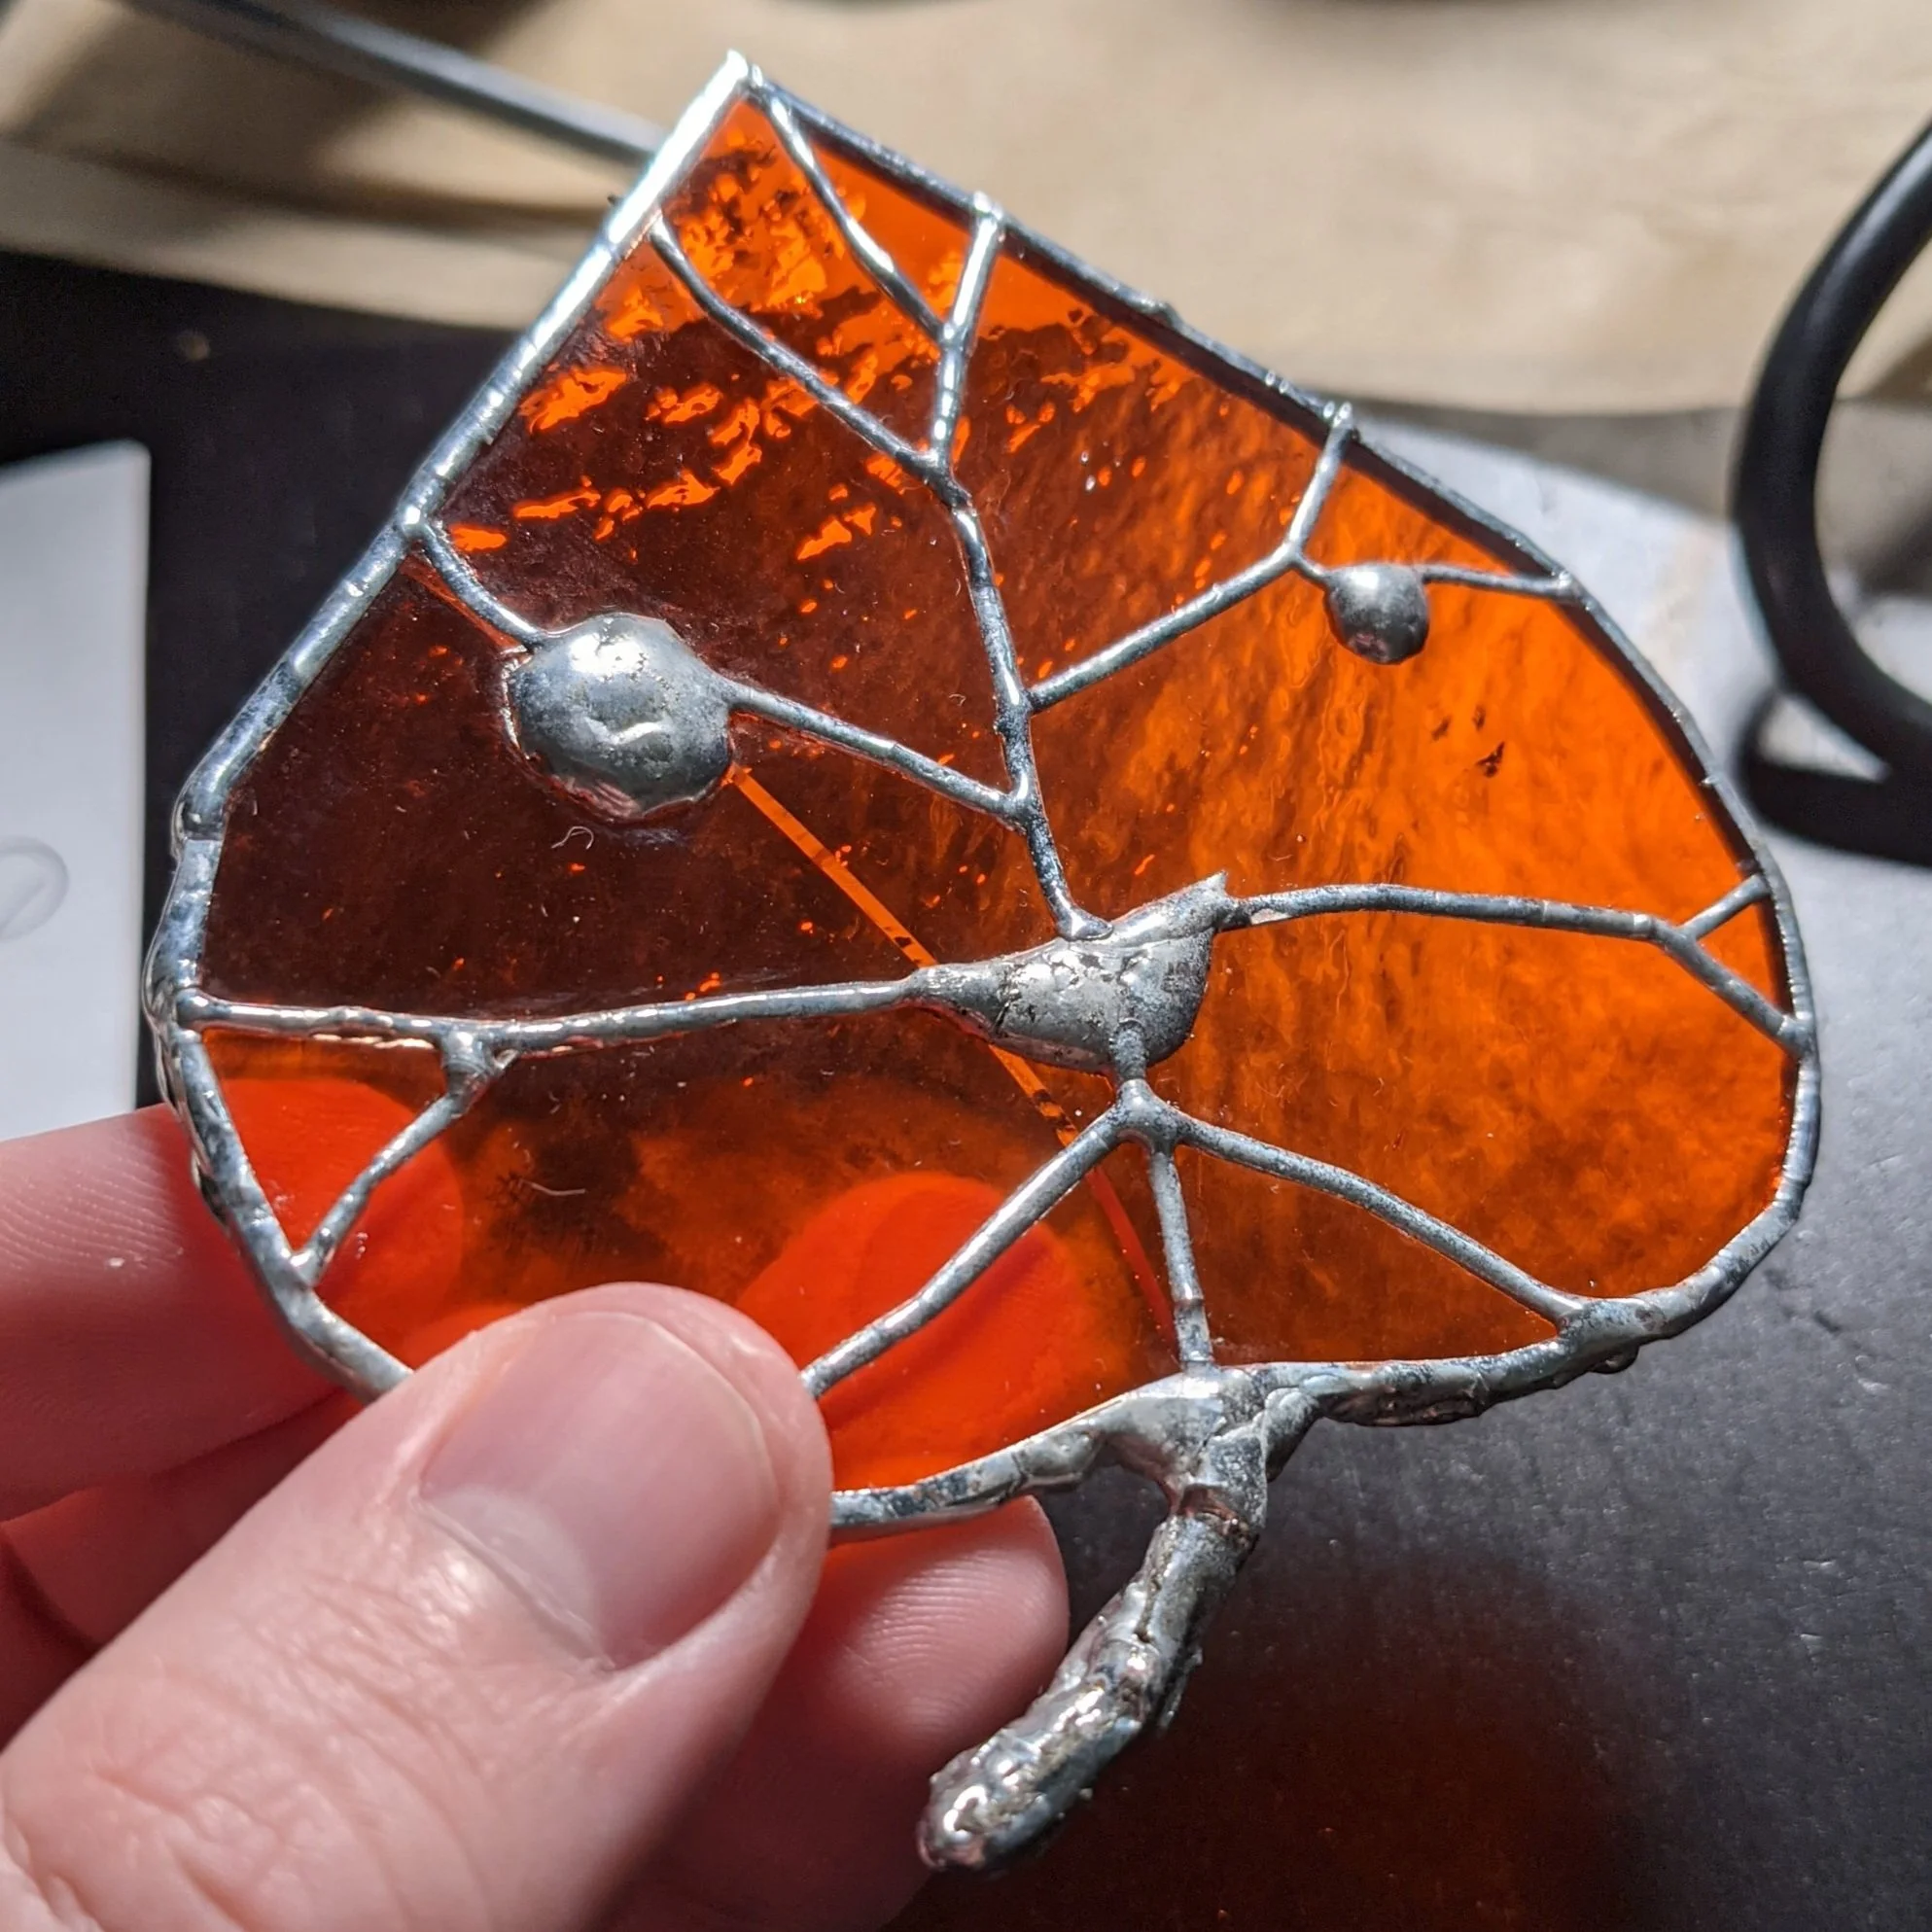
Most pieces soldered together easily enough but for extra textures on the face, I used the copper tape to draw leaf lines and run solder along those. The same technique was also used for eyes, a mouth, and stem to the leaf mask. The shorter of the 2 Koroks I designed struggled with a large eyepiece too close to the edge of the glass. Soldering irons easily heat up to around 600 degrees Fahrenheit so keeping the heat in one place on the glass for too long kept stressing it out and caused my Korok’s face to crack…many times, and always around the large eye. I decided to swap the face around a bit keeping larger solder objects more towards the center of the face and stopping the piece from cracking during assembly


Once all the Koroks were assembled with no cracks the final step was to apply a patina to them. Patina is a film on the surface of metals that produces oxidation. This product is specifically made for stained glass to force the solder to quickly darken, in my case black. After doing some testing on my practice stained glass I applied it to the Korok’s with an acid brush, let it sit for a little bit, and wiped off the extra liquid leaving a bold, yet cheery, Korok to hide in my partner’s flower pots.